Let's get ProximityLock protecting your computer. This takes under 5 minutes, and most of it is just selecting your device. We designed the defaults to work right away, so you can fine-tune later if you want to.
The Simple Path: Just three steps: grant permissions, select your device, enable monitoring. That's it! We set the defaults to work for most people right away.
When you first launch ProximityLock, allow access when prompted:
If you need to check or change permissions later, see Settings - Permissions.
In the ProximityLock window:
Can't find your device? Make sure Bluetooth is enabled on both your computer and the device. See Troubleshooting - Device Not Detected.
In the main window, turn on both switches:
You're done! Your computer is now protected.
Before trusting ProximityLock with your security, verify everything works:
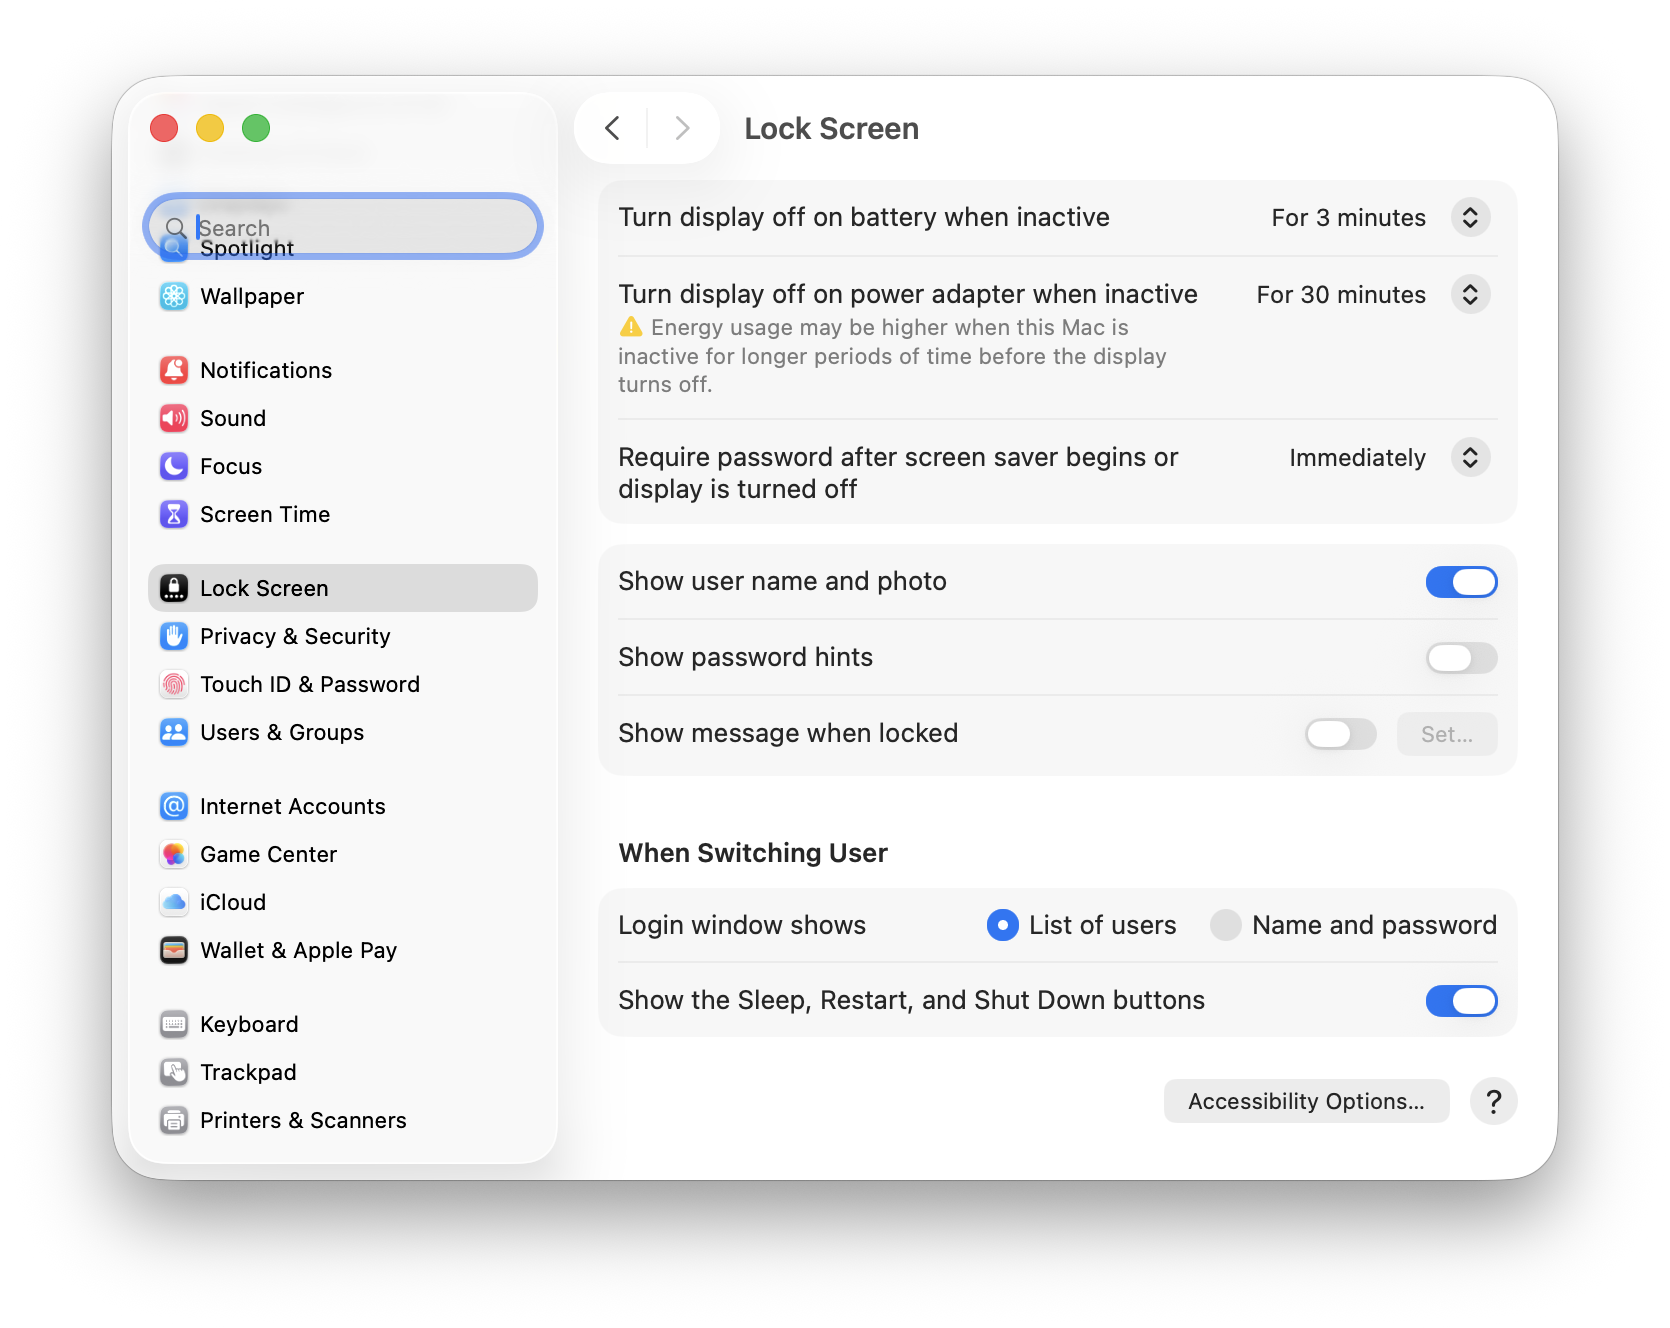
Important: Open System Settings → Lock Screen and enable "Require password immediately after sleep or screen saver begins". ProximityLock will activate your screen saver, but without this macOS setting, anyone can wake your screen without entering a password!
ProximityLock activates your screen saver when your device goes out of range. This macOS setting is what actually requires a password when the screen saver is active. Without it, the screen saver provides no security.
If locking doesn't work: Check Troubleshooting - Screen Locking Not Working for solutions.
We set the defaults (threshold: -70 dBm, timeout: 12 seconds) to work in most environments. You really don't need to change anything unless:
Our Recommendation: Live with the defaults for a few days first. Only adjust if you're seeing issues. We included the tuning options for optimization, not because you need them for basic operation.
Open Settings... and watch the real-time signal graph:
For detailed information about tuning these settings, see Settings.
For more answers see the FAQ page.
© 2025-2026 - Michael Sinz